Better Breakfasts: A Love Letter to Skyr

billowy clouds of skyrEven though I am, sadly, growing more lactose intolerant by the day, I love dairy products dearly — perhaps more than ever. Luckily, there are some that I can still consume without too much unpleasant consequence (including kefir, certain aged cheeses, butter, and some yogurts) and I am deeply thankful that one of my most beloved of all — a glorious Nordic product with a nutritional profile that sounds like the stuff of myth — is still within my safe zone. [Cultured dairy products in general are easier for the lactose intolerant to stomach, because the bacteria digest some of the milk sugars for you. And strained cultured dairy products are even easier still, since much of the remaining sugars are strained away along with the watery whey.]

I first discovered skyr ten years ago, on a summer trip to Iceland to visit some friends. When my friend Eyjolfur brought me to a local Krónan supermarket, I was as thrilled as I always am on a first visit to a supermarket in a new country. (Hint: pretty darn thrilled.) Salty black licorice coated in chocolate: wild! Jugs of whey: Who knew you could buy that? But what really caught my eye was an entire refrigerated wall full of colorful tubs of endless flavors of what appeared to be yogurt. “Not yogurt,” said Eyjo. “Better than yogurt.”

Better than yogurt?! This, I had to try. I’d actually never been the hugest yogurt fan until I’d moved to Italy the year before, but discovering that yogurt was not necessarily a watery, gelatinous, preservative-filled substance tasting of chemicals and sugar was quite a revelation. Italian brands such as Mukki and Parmalat already knocked any U.S. brand on its ass, but I fell quickly and deeply in love with Müller, an incredibly rich, creamy German brand with flavors that sounded (and tasted) like a dessert list: coconut, banana, pineapple, lemon, coffee, walnut, hazelnut, chocolate chip, and my favorite, “crema Chantilly” (whipped-cream flavor!). And all with very short and easily comprehensible ingredient lists. No gelatin or other weird fillers. No artificial colors, flavors, or preservatives. And so my obsession with European yogurt began. It was also in Italy that I first tasted mind-bogglingly thick, smooth Greek yogurt (and on a trip to Greece I was fortunate enough to try the real deal).

Image

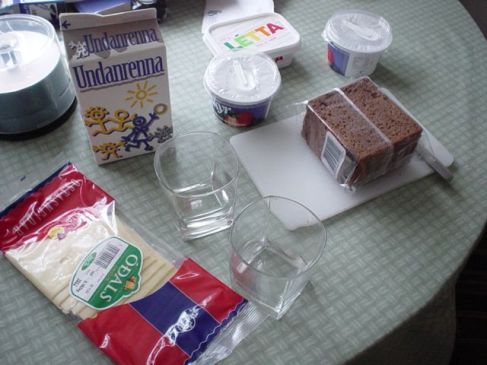
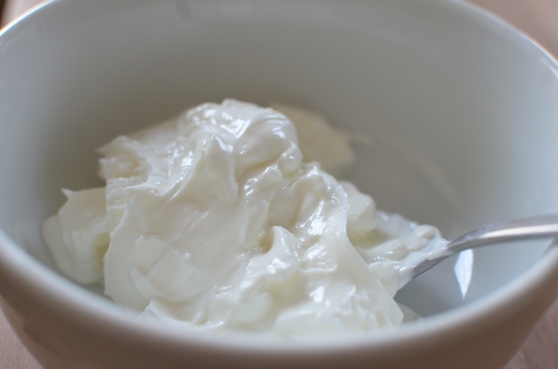
When Eyjo and I got back to his place and set up our Icelandic breakfast, I sampled the blueberry-strawberry skyr that we’d bought and found that he was right: This stuff relegated all those others (wonderful though they are and remain) to the second tier of fermented dairyland. Skyr was even thicker, creamier, richer, and more velvety than full-fat Greek yogurt, and without yogurt’s characteristic strong sour tang. Plus it had more protein than even a strained yogurt like Greek yogurt. And yet — via some sort of Viking black magic — it was entirely fat free. How was this possible??

Image

As Eyjo informed me, skyr is not really a yogurt at all, though it has been marketed as one since it was introduced to the UK and the US. Yogurt is made by fermenting whole, low-fat, or skim milk with bacterial cultures. Greek yogurt is made by then straining the liquid whey and concentrating the milk solids, resulting in a thicker texture, less sugar, and more protein. While many yogurts are generally well-tolerated by those cursed with lactose intolerance since the bacteria digest most of the lactose (milk sugar) as part of the natural fermentation process, any strained yogurt is even easier to digest since much of the remaining lactose gets strained away as well.

Skyr, meanwhile, also starts with milk fermented by bacterial cultures (different cultures than those used to make yogurt, however), but it is made from skim milk that has already had the cream separated out (to make butter). Rennet is also added to this fermented milk so that it coagulates, and the liquid whey is then strained away, leaving only the milk solids. This makes skyr, technically, a fermented soft cheese.

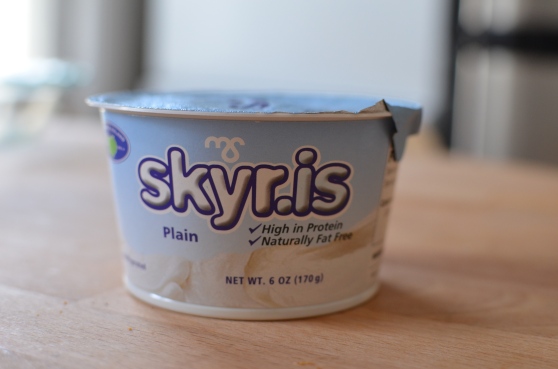
skyr.is skyr

First available here in 2005, skyr is still slowly making its debut in the U.S. My favorite brand, Skyr.is, is the only one currently sold in this country that’s actually made in Iceland. Though only available in four flavors here (plain, vanilla, blueberry, and strawberry) and only in Whole Foods markets in select regions, it is authentic, made with milk from grass-fed Icelandic cows.

There are a couple of American-made, skyr-inspired products on the market as well, which are more widely available: Siggi’s (made in New York by an Icelandic immigrant named Siggi) and a newcomer called Smári (made in California by an Icelandic immigrant named…you guessed it…Smári). I’ve tried both, and while I think Siggi’s tastes like a very good strained yogurt, to me it’s not quite the same as either the skyr that I tried in Iceland or the imported skyr. It has a thinner consistency, slightly lower protein content, and a more sour taste — closer to Greek yogurt.

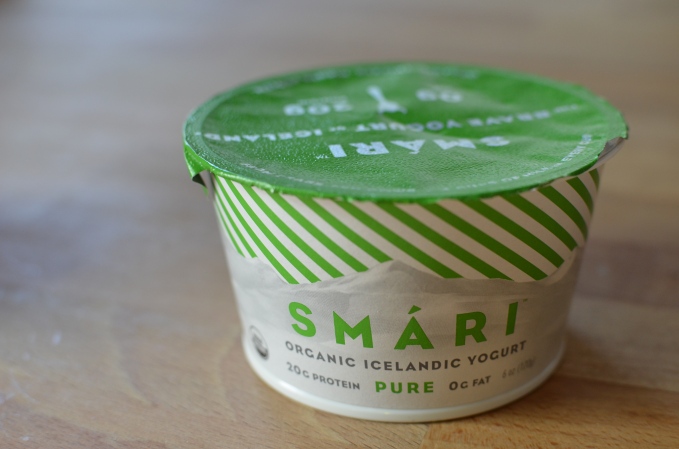
Smari skyr

I found Smári to be much closer to Icelandic skyr in terms of texture and nutritional profile, though it’s still tarter — and more yogurt-like overall — in terms of both taste and texture. It does offer the additional benefits of being organic, however, and made with milk from grass-fed cows. I’m not sure that the U.S.-based skyr makers use rennet as there’s no mention of it on their websites — I wonder if perhaps that’s why they don’t resemble the Icelandic skyr as much as you’d expect? Or it could be due to different bacterial cultures.

All this is not to say that I no longer love Greek yogurt (Fage is my favorite brand) or regular yogurt. I still have love for them all, and sometimes prefer them. But skyr is still not as well known in this country as it should be, especially for those looking for the most protein bang for their caloric buck. And in a super thick and creamy texture, to boot. Skyr is so thick and creamy, in fact, that sometimes it’s a bit hard to eat an entire 6-ounce container of it. (But I have a fantastic solution for that, which I shall reveal soon in an upcoming post! Stay tuned.)

For the purposes of this comparison chart, I’m only comparing plain skyr and yogurts with nothing added, because that’s how I prefer to buy them, and add my own fruit or other flavorings. Skyr.is is, sadly, only available in plain, vanilla, strawberry, and blueberry in the U.S. (in Iceland the flavor varieties are breathtaking and seemingly endless), Smári offers the same flavor options, and Siggi’s is available in many unusual flavors, including: grapefruit, orange & ginger, pineapple, and peach.

NUTRITION STATS COMPARISON (per 6 oz/170 g)

Calories

Fat

Protein

Sugars

Calcium

Organic

Grass-Fed

Skyr.is Plain 110 0 g 22 g 6 g 20%

Y

Smári Pure 100 0 g 20 g 6 g 20%

Y

Y

Siggi’s Plain* 90 0 g 17 g 4.5 g 23%

Y

Fage 0% Greek Yogurt – Plain 100 0 g 18 g 7 g 20%
Stonyfield Organic Plain Nonfat Yogurt 80 0 g 8 g 12 g 25%

Y

Y

Dannon All-Natural Plain Nonfat Yogurt 80 0 g 9 g 12 g 30%
*NOTE: Siggi’s is sold in 150-g (5.3-oz) containers, at 80 calories for plain; I scaled Siggi’s data up for comparison purposes, as all the other brands are sold in 170-g (6-oz) portions.

Some of my favorite ways to enjoy either skyr are:

  • with a handful of fresh blueberries and a dollop of lemon curd
  • topped with fresh raspberries, blackberries, or sliced strawberries
  • with a generous spoonful of blueberry-vanilla-chia jam (recipe coming soon!) and sprinkled with Ezekiel 4:9 cereal (which closely resembles Grape Nuts in appearance and flavor, though it’s  more nutritious)
  • in place of sour cream or yogurt in toppings and recipes (it’s particularly wonderful in baked goods, keeping them rich and moist without adding any fat)
  • in a smoothie (e.g., with kefir, bananas, and cocoa powder)
  • drizzled with olive oil and za’atar and eaten with pita bread and some of my homemade kibbeh
  • mixed with chopped mint leaves, Persian cucumbers, and a little salt
  • stirred together with a dollop of spicy Indian mixed pickle

Have you tried skyr yet? How do you like to eat it?

Better Breakfasts: Blueberry-Walnut Steel-Cut Oats

Blueberry-Walnut Steel-Cut Oats

Lounging lazily in one corner of the freezer, there’s a bag of at least a pound of plump blueberries left over from a slightly overzealous blueberry-picking expedition last summer. Every now and then, a handful gets tossed into a smoothie, but they’re starting to show signs of freezer burn and I’ve been trying to come up with other ways to use them. This morning, as I reached into the freezer for the steel-cut oats to make some porridge for breakfast, my eye landed on the neglected bag of berries and I thought of stirring some in with the oats as they simmered. I added some walnut pieces as well (toasted first to bring out their warm, nutty flavor) and a little vanilla extract. The result was fantastic: not only did the porridge taste almost freakishly like a blueberry muffin (a much healthier version, however), it had a gorgeous lavender color, swirled with streaks of bright violet. A cheerful touch to a rather bleak and snowy morning.

Blueberry-Walnut Steel-Cut Oats

1 cup water
1 cup milk (I used 2% — you can substitute with your dairy replacement of choice, or use all water, though the result will be less creamy)
1/4 tsp salt
1 cup quick-cooking steel-cut oats (I used Bob’s Red Mill)
1 cup blueberries, fresh or frozen
2 TB walnut pieces, lightly toasted
1/2 tsp vanilla extract

  1. Bring water, milk, and salt just to a simmer in a large saucepan over medium-high heat.
  2. Stir in the oats, turn the heat to low, and simmer 5-6 minutes, stirring frequently with the handle of a wooden spoon (or a spurtle, should you happen to have one). When there are about 4 minutes left (for frozen) or 3 minutes left (for fresh), stir in the blueberries.
  3. When the oats have reached your preferred tenderness, turn off the heat, stir in the walnuts, and let sit for 2 minutes to thicken.
  4. Just before serving, stir in the vanilla extract. Serve as-is or topped with brown sugar, maple syrup, honey…or your sweetener of choice.

Green Walnuts, Nocino, and Baptist Johns

The green walnuts have arrived!

Today, June 24th, is the day that Florence celebrates its patron Saint, San Giovanni (a.k.a. John the Baptist), and traditionally it’s also the day when unripe green walnuts are gathered for making nocino, a complex, nutty, and slightly bitter dark brown liqueur. It’s usually served as an after-dinner digestivo, but can also be used to “correct” a shot of espresso, poured over gelato, mixed into cocktails, or used in place of vanilla extract in baking (biscotti would be a a good application for that). Green walnuts are only available for a brief span of time every June and last year I missed the window of opportunity, but this year I managed to get some before it was too late. I ordered 5 pounds of green walnuts (about 40 walnuts) from Haag Farms in California; they were delivered to my doorstep just in time (I’m leaving soon for a trip to London). Although I’ve spent some time on walnut farms, I’d never really examined a green walnut up close. I sliced one in half to see what it was all about. The fetal walnut looked like nothing so much as a tiny, translucent brain. It had the shape and form of a walnut but was clear and jelly-like. Weird! Fascinating!

A green walnut, halved. It’s like “The Nut with Two Brains.”

Cutting through these suckers was not easy, even with a sharp chef’s knife and even though the immature shells lining the inside of the green husks were still quite thin. It took some muscle to cut them. (Also note: If you care at all about your manicure, wear gloves for this part. The walnut juice will stain your fingers, nails, and cutting board an icky yellow that later turns dark brown.) Once I had 25 of them quartered, I placed them in a large glass jar with 1 quart (4 cups) of 190-proof Everclear. What’s that you say? Everclear is illegal in Massachusetts? Yes, I’m aware of that. Let’s just say I had it smuggled in from a less puritanical state where people have the freedom to infuse their own liqueurs. I also added the zest of one lemon, a few cloves, a stick of cinnamon, some coffee beans, and half of a nutmeg. Recipes vary wildly on the spices — some add juniper berries, vanilla beans, or orange zest. I decided to be very sparing with them, since a good nocino doesn’t taste strongly of any individual spice; the hard-to-describe green walnut flavor should predominate: nutty, slightly bitter, a touch oaky and medicinal, and a bit vanilla-y and sweet as well.

What you need to make nocino.

Once everything was in the jar, I closed the lid tightly and gave it all a good shake. Most recipes for nocino instruct you to leave it in a bright, sunny spot to macerate, but that seems counter to all logic about infusing liquor. Light can degrade and destroy flavor/aroma compounds, so I chose to store my big moonshine jar in a cool, dark cupboard, just like I do when I make limoncello.

All ready to hurry up and wait.

Just a few hours later, a peek into the jar revealed that the walnuts had already begun to oxidize and turn black (particularly any that were sticking out above the water line) and the liquid had turned a dark, evil-looking, greenish-black. Yikes. Just what exactly was I brewing up, here? The last nocino that I had was an ersatz commercial version, which had been tinted brown with caramel coloring. I assume that the real deal is supposed to be this scary color.

Mmmm, delicious?

And now…the wait begins. Most people advise letting it sit for about 40 days before adding simple syrup, then letting it sit for at least another month before straining out the solids. At that point it is, in theory, ready to drink, but common wisdom–and the “Order of Modinese Nocino“–dictate that to really get something special, you need to then let it age and mellow for at least a year (better yet, two). I’m not sure I have that kind of patience, but we’ll see what happens. As it is, it’s torturous to have to wait two months to taste it. This will be a long-term project, obviously, and I’ll post follow-ups as it progresses. If you want to try your hand at nocino as well, get your orders in quick — the magic time for green walnut gathering is just about over (if not over already).

The formula that I used is a mixture of one from my friend Judy, one that Haag Farms sent along with the shipment of green walnuts, and my own inspiration (nutmeg just seemed to go well with walnut).

Nocino

25 green walnuts, quartered
1 quart (4 cups) Everclear
4 cloves
1 stick cinnamon
1/2 nutmeg (grated on all sides)
10 coffee beans (I used Blue Bottle Finca El Majahual)

Simple syrup: 3 cups sugar dissolved in 4 cups water

  • Wash walnuts and quarter lengthwise.
  • Place walnut quarters in large glass jar with Everclear and spices. Seal tightly and shake well.
  • Let sit in a cool, dark place for 30-40 days.
  • Add simple syrup and shake well. Return jar to a cool, dark place and let sit 30-60 days.
  • Strain out solids. Store nocino in tightly sealed glass bottles or jars. It can be used immediately, or aged for an additional 1-2 years for the best and most complex flavor. The bitterness lessens with time.

Strawberry Picking Ice Cream

Berry picking in Ipswich.

This past Sunday, I went strawberry picking with my friend Denise. Our trip to Russell Orchards in Ipswich was not very fruitful (pun most certainly intended). The place was pretty much picked over (I meant that one, too). After hours of backbreaking manual labor we’d each managed to collect barely a quart of tiny, sort-of ripe, slightly shriveled berries that had already started molding the next day.

Strawberries picked at Russell Orchards. “Slim pickin’s.”

But Denise was not about to settle for such substandard strawberries, and tried again yesterday at Verrill Farms in Concord. This time, she hit the jackpot: shiny, sweet, deep red, flavor-packed gems. Armed with this luscious new supply of fruit, I was ready to try out my brand-new ice cream maker, the Cuisinart ICE-21.

Strawberries picked at Verrill Farms. “Super berries.”

Besides the poor quality and scarce quantity of berries, the oppressive heat this past week deterred me from making ice cream, since all of the recipes I found called for cooking a custard base. As soon as I saw the words “double boiler,” I was put off. But then I spotted this beautifully simple GourmetPerfect No-Cook Strawberry Ice Cream” recipe and regained interest in the Strawberry Ice Cream project. My only modifications were to sub whole milk for half of the cream (sometimes I find ice creams made only with heavy cream a bit greasy) and to add a bit of vodka to keep the ice cream from getting too rock-hard in the freezer. This was my first go with the Cuisinart, but clearly the yield of this recipe was a bit much for it, since it started overflowing within the first five minutes. Next time, I’ll either halve the recipe or freeze it in two batches. If you have an ice cream maker with a larger capacity (the ICE-21 allegedly holds up to 1-1/2 quarts, but couldn’t contain this recipe, which supposedly yields exactly 1-1/2 quarts), then go for it all at once. As I frantically spooned the excess into a bowl, the ice cream stopped rotating around the blade at one point, and I couldn’t tell if this was because my machine was malfunctioning (hope not) or because I’d poked at it with a spatula, and it was annoyed. We’ll see how the next batch goes.

As for the ice cream itself, it was fantastic: rich and smooth, and a stunning deep pink color. Actually, though completely natural, it was kind of a crazy pink color — it could easily have been described as either “shocking pink” (my mother’s favorite color) or “Pepto-Bismol-y.” Since it was uncooked, it had retained the tang of fresh berries and wasn’t overly sweet. Ice cream success!

Homemade shocking-pink strawberry ice cream.

No-Cook Strawberry Ice Cream
Makes 1-1/2 quarts

1 lb strawberries, washed and trimmed
3/4 cup sugar
3/4 teaspoon fresh-squeezed lemon juice
pinch salt
1 cup heavy cream
1 cup whole milk
1 1/2 teaspoons vodka (I used Smirnoff 100 proof)

Partially mash the strawberries with the sugar, lemon juice, and salt in a large bowl, using a potato masher. Let sit for 10 minutes. Transfer half to another bowl and puree with an immersion blender until smooth. Mix the two halves back together, stir in the cream and vodka until well combined, and chill in a metal bowl in the refrigerator for about 3 hours, then freeze in an ice cream maker. Transfer to an airtight container (tightly covering the surface with a piece of plastic wrap before putting on the lid) and freeze until firm (another few hours).

D.I.Y. Frappuccino

I’m an admitted coffee addict. I need my caffeine fix every morning, or I’m a cotton-headed ninny-muggins and irritable as heck. In the summer I usually opt for a caffè shakerato (a shot of espresso vigorously shaken in a cocktail shaker with ice until frothy). But in the midst of a heat wave like the one we’ve been suffering through here in Boston (97 degrees yesterday!), even turning on the smallest burner to brew coffee in my tiny 1-cup moka pot is unbearable. I’m too thrifty to shell out three or four bucks a day for some blended iced coffee concoction at the local Starbucks or Double D, and also way too much of a snob to stomach the crappy stuff they call coffee.

So my solution was to use my larger 3-cup moka pot for a few days at the beginning of this week (when temps were in the more-reasonable 70s range) to brew up some Illy, which I then poured into ice cube trays and froze (thanks, CR, for that great idea!). Today I pulled out my handy immersion blender, popped the frozen shot collection into a tall container, poured in a little milk, and ecco fatto — your own homemade frappuccino in a matter of seconds, but it tastes so much better. (It might be easier to sweeten the coffee before you freeze it, unless you have some simple syrup on hand.)

Stay cool!

Farmers’ Market Friday: Green Garlic

Spring has finally, officially returned and with it, the Copley Square Farmer’s Market on Tuesdays and Fridays. In a few days, I will start my fantastic new job at America’s Test Kitchen, and since I will only be working half-day Fridays all summer (!!!!), I’ll be able to visit the market on my way home, and early enough in the day that it should still have a good selection. Last year, I had to content myself with whatever dregs were left at the end of the day, and most stands were usually already packing up to leave by the time I arrived at the market. I can’t understand why farmers’ markets in the Boston area have hours that make them practically inaccessible to anyone who works full-time, particularly if you consider their astronomical prices.

This first week, not all of the usual stands were there yet. I saw Old Friends Farm, Iggy’s Bread, and a new fresh-pasta stand, Nella Pasta. At the Siena Farms stand, I was fascinated by the beautiful, long stalks of green garlic. I’d never cooked or eaten it before, so I decided to give it a shot. My goal is to try one vegetable or fruit that is completely new to me each week; I love the challenge of figuring out what to do with it. Green garlic — a young garlic plant harvested before the lower part of the stalk has begun to form the bulbous head of garlic cloves — is a particularly ephemeral item that is only available for a few short weeks in the early spring.

I took the stalk of garlic home, somehow managed to angle it into the fridge (it was nearly two feet long, from the roots to the tips of the leaves), and noticed that the leaves started to wilt soon after. The woman I’d spoken to at the farm stand had told me that the dark green leaves are inedible, in any case. You can only eat the pale green and white parts of the stalk, just like with leeks.

Green garlic can be used raw or cooked. I sampled a small piece raw to see how it tastes. The plant itself gives off a strong garlic scent, and it definitely tasted garlicky, but it’s milder than raw garlic cloves, and with less of a pungent, bitter edge. I decided to cook the garlic into a soup with a bunch of young sweet-pea shoots that I’d also bought at the market. The soup that I made turned out absolutely delicious, tasting of springtime, although it wasn’t as smoothly textured as I’d have liked. I blended with an immersion blender for several minutes but could not get the pieces of pea shoot any smaller. Adding dairy (such as cream or crème fraîche) to the soup might help give it a more velvety texture, but I wanted to keep it light and spring-y.

Green Garlic and Sweet-Pea Shoot Soup

(Serves 2)

1 TB unsalted butter
1 stalk green garlic (white and pale green parts only), finely minced
2 cups water or broth (vegetable or chicken)
1 bunch sweet-pea shoots
sea salt and freshly ground pepper to taste
a squeeze of fresh lemon juice

  1. Melt the butter in a medium-sized stockpot over low heat, and then add the green garlic.
  2. Cook over medium-low heat, stirring frequently, until softened and translucent.
  3. Add water or broth; season with salt and pepper to taste.
  4. Cover pot and bring to a boil, then toss in the pea shoots, cover again, reduce heat and simmer gently for about 5 minutes, or until shoots are wilted and tender.
  5. Puree using an immersion blender, blender, or food processor.
  6. Stir in lemon juice and serve immediately.

This would also be nice served topped with a dollop of crème fraîche, either plain or flavored with fresh mint.

William Woodville: „Medical botany“, London, J...

Image via Wikipedia

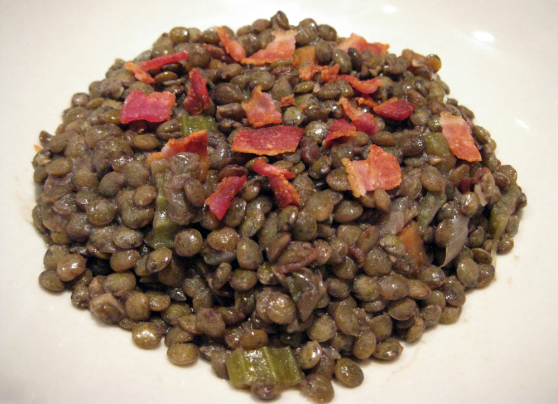
Puy Lentils with Bacon and Beer

1/4 lb bacon (about 4 strips), diced; plus 2 extra strips, cooked separately until crisp and crumbled (for garnish)
1 large clove of garlic, minced
1/2 medium onion, diced
1 carrot, diced
1 stalk of celery, diced
1 lb (16 oz) French green (Puy) lentils
4 cups chicken broth
2 stalks of fresh thyme, leaves stripped from stems
2 TB beer (I used Samuel Smith’s Nut Brown Ale.)
Salt and pepper, to taste

  1. In a large, heavy-bottomed Dutch oven or sauce pot, cook the bacon over medium-high heat, stirring frequently, until browned and crisp.
  2. Add the garlic, onion, carrot, and celery.  Cook for about 5 minutes, or until softened.
  3. Add the lentils and thyme leaves and cook for about 1 minute, stirring.
  4. Add the broth and mix well. Bring to a boil, then lower the heat and simmer, covered, for 30-40 minutes, or until lentils are tender and liquid has been absorbed, stirring occasionally.
  5. While lentils are simmering, cook the 2 extra strips of bacon separately in a frying pan until well browned and crisp.
  6. In the last few minutes of cooking the lentils, add a few splashes of beer (about 2 TB) to the pot.
  7. Adjust seasoning to taste with salt and pepper and serve, topped with crumbled bacon.

Buddhini, jiggling tranquilly in a sea of tropical fruit…

A few years ago, my friend Brendan gave me a delightful gift that I absolutely adore — an ingenious set of dessert molds in the shape of little Buddhas — and I finally have gotten around to using them. Their name is a clever pun in Italian; “Buddhini” means “little Buddhas,” and is also a homophone of budini, or “puddings.”

I used a Thai jasmine-flavored agar dessert mix that you can easily find in most Asian food markets; it’s also available in almond flavor. You simply dissolve the powder mix in boiling water, pour into the molds, and refrigerate for at least an hour, or until firm.  I supported each mold in a small bowl by bunching up paper towels and using them to prop the molds upside-down.  You could also insert each one in an appropriately sized drinking glass or jar.  Once they have set, unmold by gently squeezing each mold over a plate, and serve with an assortment of tropical fruit (fresh, canned, or a mixture). A refreshing dessert for the summer. Yes, I’m aware that it’s not yet summer in Boston — or anywhere near it — but I can dream, can’t I?  I’m getting tired of root vegetables and hearty stews.

Want to try making Buddhini yourself?  You can find more information on the molds — including many recipes and where to buy them — online here:  http://www.nobodyandco.it. They’d also work great with ice cream, pudding, panna cotta, or any other type of dessert or savory treat that firms up in the fridge or freezer (they are not, unfortunately, oven safe).

Don’t Turn the Spurtle Widdershins


Porrige Spurtle

Porrige Spurtle (Photo credit: Wikipedia)

It sounds like a nonsense word straight out of “Jabberwocky,” but a spurtle (or “spirtle”) is a Scottish cooking implement with a history dating back to the 15th century, closely intertwined with that of porridge (we know it as “oatmeal”), the traditional staple food of Scotland. It’s a wooden dowel used to stir the oats during cooking to prevent the formation of lumps and to create a thicker, creamier porridge. The origins of the name are murky, although the Oxford English Dictionary points to the Latin spatula as a possible root.

Early versions of this instrument were made from a thin, straight branch of a tree, and usually turned from hardwoods such as beech, oak, chestnut, or ash. Scottish housewives who didn’t have a spurtle might have used a rung from a ladder.

They are typically about a foot long, an inch in diameter, and cylindrical, with one rounded end. Usually somewhat tapered at the stirring end, spurtles are often shaped at the handle end in the form of a thistle, a national symbol of Scotland.

As with all wooden cooking tools, treating a spurtle with mineral oil before use and after each wash will keep it in good condition and lengthen its lifespan.

According to tradition, only the right hand should be used for stirring porridge, and it should only be stirred in a clockwise direction, as stirring “widdershins” (or counter-clockwise) was believed to invoke the devil and bring bad luck.

Today this stirring stick lives on — at least in name — in the “Golden Spurtle”: the World Porridge-Making Championships held annually in the Scottish Highland village of Carrbridge, although the rules do not specifically require the use of a spurtle in the competition.

Of course, you don’t specifically need a spurtle to make porridge at home either — the handle of a wooden spoon will do just as well, but it is important to stir oats frequently during cooking to help disperse the starches, which makes for a thicker, creamier bowl of cereal.

Traditional Scottish Porridge

Makes 3 cups

The conventional cooking method is a lengthy endeavor requiring upwards of half an hour. Soaking the ingredients overnight allows you to have breakfast on the table within 15 minutes. Serve with individual bowls of milk, cream, or buttermilk for dunking each spoonful of porridge before eating. Porridge can also be served with brown sugar, jam, honey, syrup, or molasses. Other time-honored conventions: For reasons that have been lost to the mists of time, porridge must always be referred to as “they” or “them” and must be eaten while standing up, using a bone spoon. If you’ve only ever eaten rolled oats (the flattened grains used in “instant” or “quick-cook” versions), which can easily turn into a gummy paste when overcooked, you may be pleasantly surprised by the nutty flavor and chewy texture of steel-cut oats.

Ingredients:

Porridge

Porridge (Photo credit: Wikipedia)

3 cups cold water
1/4 teaspoon salt
1 cup steel-cut oats (known as “pinhead” oats in Scotland)
1 1/2 cups milk, cream, or buttermilk (optional, for serving)

  1. In a medium saucepan, bring water and salt to a boil.
  2. Stir in oats and boil for 1 minute.
  3. Cover and let stand overnight at room temperature.
  4. The next morning, uncover, stir well, and bring to a simmer over medium heat.
  5. Reduce heat to low and simmer 5-10 minutes, stirring frequently with a spurtle (or the handle of a wooden spoon), until the porridge is thick and creamy and the oats are tender.
  6. Remove from heat and let stand, covered, for a few minutes before serving.

Carrot and Cilantro Soup

Carrot and Cilantro Soup

Carrot and Cilantro Soup

Our Deep Winter CSA share from Red Fire Farm was far more interesting this week: carrots, baby salad greens, beets, garlic, cilantro (With the roots! Cilantro roots are an important ingredient in Thai cooking and very difficult to find in this country.), red onions, cabbage, radishes, and an amazing Jersey Cheddar cheese from The Farmstead at Mine Brook.

Tonight I used the carrots and cilantro to make this velvety, comforting soup. It’s good served with toasted and buttered slices of a hearty bread. I used Tuscan Wheat from When Pigs Fly bakery.

Ingredients:

  • 2 tsp olive oil
  • 1/2 tsp ground coriander
  • 1/2 tsp ground cumin
  • 1 lb onions, thinly sliced
  • 2 lbs carrots, peeled and sliced thin
  • 5 cups water
  • 1/2 cup heavy cream
  • 1 bunch fresh cilantro, washed, dried, and roughly chopped
  • salt and freshly ground pepper, to taste
  1. In a large stockpot, heat olive oil over medium-low heat. Add coriander and cumin and stir well.
  2. Add onions and cook over medium heat, stirring occasionally, until translucent, about 5 minutes.
  3. Add carrots and water and salt to taste.
  4. Bring to a boil, then lower to a simmer, cover, and let simmer for about 30 minutes or until carrots are very soft.
  5. Remove pot from heat and stir in cream.
  6. Puree the soup thoroughly until it is velvety and smooth (a hand-held immersion blender works well for this step, although you can also use a food processor or upright blender).
  7. Adjust seasonings as desired, then stir in cilantro and serve.